⚠ Do now
Real laboratory. Individual recovery plans.
Hard drive
data recovery Brisbane
The drive failed.
Let’s focus on the files that matter.
Family photographs. Client work. Years of business records. Tell our Brisbane laboratory what happened and what you need back. We build the recovery plan around your drive, your priorities and your budget.
Levels 1 & 2: $0 upfront recovery fees.Levels 3–5 have an agreed upfront fee for complex laboratory work. Your written quote explains every stage before you approve it.
 ON THE WILDFIRE BENCH
HARD DRIVE RECOVERY
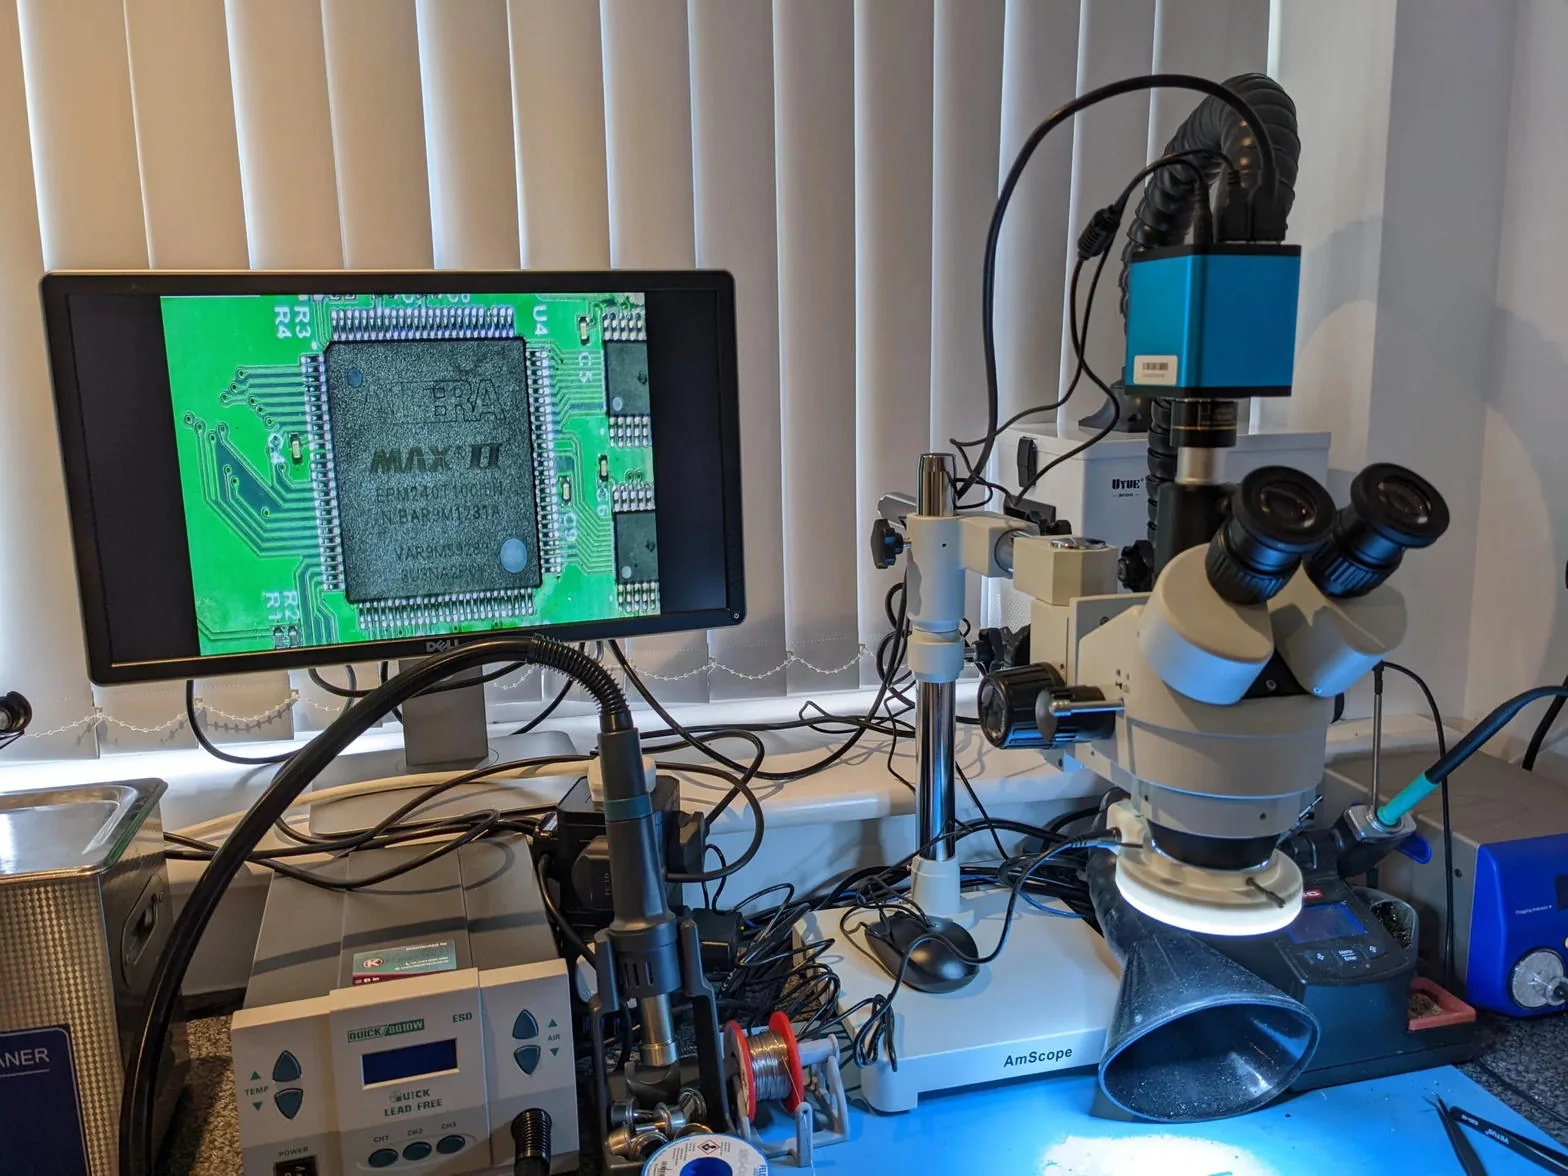
Photographed inside Wildfire.
Brisbane laboratory · Australia-wide mail-in
Free standard diagnostic
Written quote before recovery
Your priorities guide the work
Start with what happened
Find your drive.
Find the next step.
Select a problem for the specialist guide. The symptom is a starting point; assessment confirms the cause.
Clicking drive
Repeated clicking, ticking or grinding.
Open the specialist guide →Dropped drive
Impact damage, clicking or no detection.
Explore the recovery case →PCB & electrical damage
Power surge, wrong adaptor or a dead board.
Open the specialist guide →Fire-damaged drive
Heat, smoke and fire-extinguisher residue.
Open the specialist guide →Water-damaged drive
Spills, flooding and corrosion.
Open the specialist guide →Drive not detected
Missing drive, wrong capacity or initialise prompt.
See what to do now →Bad sectors & freezing
Slow reads, I/O errors and failed copies.
See what to do now →Deleted or formatted
Lost files, partitions or a quick format.
Open the specialist guide →
Protect the next chance.
Dropped, wet, grinding or repeatedly clicking with failed reads? Leave it disconnected. Avoid formatting, repair scans and repeated power-on attempts.
Not sure which description fits?Choose an observation and add it to your enquiry.
Symptom checker
What is your hard drive doing?
Select what you have already observed for useful next steps. This guide cannot diagnose a drive or predict recovery success. You do not need to reconnect it to answer.
Clicking or grinding
Observed symptom
Assessment confirms the causeStop and leave the drive off
Repeated clicking with failed reads, or grinding, can indicate physical damage. Sound alone cannot identify the failed part.
What to do now
Disconnect the drive. Note what happened before the noise began and keep the original enclosure and cable.
Avoid
Do not repeat power-on attempts, open the drive or run a repair scan.
Beeping or not spinning
Observed symptom
Assessment confirms the causePause before trying again
Beeping can be associated with insufficient power, a connection problem or a mechanical fault. It does not prove that the heads are stuck.
What to do now
If the drive was dropped, smells burnt or contains irreplaceable files, leave it disconnected and ask for advice. Keep its original power supply and enclosure.
Avoid
Do not shake or tap it, use an incompatible power supply or repeatedly reconnect it.
No power or response
Observed symptom
Assessment confirms the causeKeep the drive and its accessories together
A cable, power supply, USB bridge or drive electronics may be responsible. A silent drive is not proof that the platters are undamaged.
What to do now
Record the model and any recent surge, wrong adaptor or liquid exposure. Contact us before attempting a board swap.
Avoid
Do not open the sealed drive or install a donor board yourself. Calibration and encryption data may be unique to the original electronics.
Not detected
Observed symptom
Assessment confirms the causeDo not initialise or format it
A missing drive can have connection, file-system, firmware or hardware problems. The symptoms help plan an assessment, but do not establish the cause.
What to do now
Write down the exact error and whether the device shows the correct capacity. Include its enclosure if it is an external drive.
Avoid
Decline prompts to Initialise, Format or Erase when you need the existing files.
Slow or freezing
Observed symptom
Assessment confirms the causeStop repeated reads and scans
Slow copies and I/O errors can come from unreadable sectors, an unstable connection or other faults. Repeated retries may stress a deteriorating drive.
What to do now
Note which folders matter most and where reads fail. If the files are important and not backed up, ask about controlled imaging.
Avoid
Do not run a full repair scan or keep restarting failed copies on the original drive.
Deleted or formatted
Observed symptom
Assessment confirms the causeStop writing to the drive
Deleted files or a quick format may leave recoverable data behind. Overwriting, discard behaviour on some drives, encryption and the type of format can limit recovery.
What to do now
Stop using the affected drive. Record what was deleted, when, and whether anything was installed or saved afterwards.
Avoid
Do not reinstall the operating system or save recovered files back to the affected drive.
Dropped or knocked
Observed symptom
Assessment confirms the causeLeave it off after the impact
A drop can affect heads, platters, connectors or electronics. Whether it was running and what happened afterwards both matter.
What to do now
Keep the drive disconnected. Tell us whether it was powered on during the fall and how many times it was tried afterwards.
Avoid
Do not open it to inspect the platters or power it up just to record the sound.
Water, fire or smoke
Observed symptom
Assessment confirms the causeDo not apply power
Environmental damage needs an individual assessment. The outside of a drive cannot show whether its internal recording surfaces remain readable.
What to do now
Contact us for handling and packing advice, especially if the device is still wet or contaminated. Tell us the exposure and any power-on attempts.
Avoid
Do not heat, rinse, dismantle or power the device to test it.
Did I make it worse?
Tick what you already tried.
Most people try something first. It changes which bench the drive starts on, not whether we look.
Imaging bench
Clean-air bench
Nothing ticked yet. Tap anything you tried; none of it disqualifies a drive.
Which bench, not which price: the free diagnostic decides the Level. See the Levels
Put these ticks in my enquiry →
1300 806 557
Exactly these ticks in the form's notes saves a day of guessing at the diagnostic.
Sources: Rossmann: freezing · Datarecovery.com: opening the drive · Rossmann: chkdsk · Rossmann: PCB and ROM · Gillware: DIY attempts · MDrepairs: recovery software on a failing drive · Zero Alpha: water damage · DiskTuna: r/datarecovery FAQ. Figures are published data, not a prediction for your drive.
Clear costs. A plan built around you.
Explore your recovery level.
Every job is customised to your needs. These guide prices help explain the fee structure; the laboratory confirms the level, scope and success criteria in your written quote.
All amounts are Australian dollars. Main fee figures exclude GST; GST-inclusive amounts are shown alongside them. Standard diagnostic: free. Any optional priority service, return media or additional scope is separately itemised before approval.
Straightforward recovery
For suitable straightforward recovery work on a drive that can be read. The assessment confirms whether the job fits Level 1.
Paid upfront
$0
No upfront recovery fee
Paid ONLY upon success
From $170
excl. GST · From $187 incl. GST
Total if successful
From $170
excl. GST · From $187 incl. GST
No upfront recovery charge. The agreed recovery fee is payable only when the agreed success criteria are met.
The recovery plan identifies the files you need, the work required and the agreed outcome. This is a starting price, not an automatic classification based on capacity or a symptom.
Discuss my recovery →More involved file recovery
For suitable jobs requiring more involved imaging or file-system reconstruction, without the specialist intervention of a higher recovery level.
Paid upfront
$0
No upfront recovery fee
Paid ONLY upon success
$320
excl. GST · $352 incl. GST
Total if successful
$320
excl. GST · $352 incl. GST
No upfront recovery charge. The agreed recovery fee is payable only when the agreed success criteria are met.
We plan the reading and reconstruction around the condition of the device and the files you prioritise. If assessment identifies work outside Level 2, the revised scope and fees are explained before approval.
Discuss my recovery →Specialist intervention
For jobs needing specialist preparation or intervention before useful reading and reconstruction can proceed.
Paid upfront
$350
excl. GST · $385 incl. GST
Paid ONLY upon success
$350
excl. GST · $385 incl. GST
Total if successful
$700
excl. GST · $770 incl. GST
$350 + GST is paid upfront for the agreed laboratory work. The remaining $350 + GST is payable only upon success. If recovery is unsuccessful, the success fee is not charged; the upfront work remains chargeable once begun.
Depending on the fault, this may involve electronics or firmware work, preservation of drive-specific information, specialist setup and controlled imaging. Your quote identifies the actual work for your device; not every job needs every procedure.
Discuss my recovery →Complex physical recovery
For complex recovery where the drive needs substantial specialist work before its data can be accessed.
Paid upfront
$725
excl. GST · $797.50 incl. GST
Paid ONLY upon success
$700
excl. GST · $770 incl. GST
Total if successful
$1,425
excl. GST · $1,567.50 incl. GST
$725 + GST is paid upfront. The additional $700 + GST is charged only upon success. If recovery is unsuccessful, the $700 success fee is not charged; the agreed upfront work remains chargeable once begun.
The approved plan may involve donor matching, head work in a clean-air environment, more than one fault, or carefully managed imaging of unstable media. The upfront fee funds the agreed preparation and recovery attempt; it is not a guarantee of readable data.
Discuss my recovery →Fire, flood & BitLocker cases
Fire damage, flood damage and drives encrypted with BitLocker need a case-specific discussion and a customised recovery plan.
Custom quote
Call 1300 806 557Upfront fees reflect the agreed complexity and scope.
Heat, residue, corrosion and encryption can change what must be done before files are accessible. We assess the combination of faults, available original parts, priority files and any valid decryption credentials. A working BitLocker recovery key or other valid unlock method may be essential; repairing the drive does not bypass encryption.
The quote sets out the upfront amount, any conditional success fee and the agreed outcome before work starts. No fixed Level 5 price is assumed.
Explore encrypted-drive recovery → · Microsoft’s recovery-key guidance
Why do Levels 3, 4 and 5 carry upfront fees?
A complex recovery can require substantial work before the drive produces a usable image or a single verified file. The upfront fee pays for the specific preparation and recovery work you approve. Those resources are committed even when the underlying damage ultimately prevents recovery.
1. Specialist diagnosis and preparation
Beyond the free standard assessment, an approved recovery can require detailed fault isolation, electronics or firmware work, and device-specific preparation. An engineer must establish a controlled way to access the data rather than simply run a file scan.
2. Parts and work that cannot be undone
Where required, compatible donor parts must be sourced and matched. Component transfers or head work use specialist time and may consume donor parts. Those costs have been incurred even if another fault or damaged recording surface limits the final result.
3. Controlled imaging and difficult reads
An unstable drive may need carefully configured hardware, monitoring and repeated controlled passes. Readable areas are secured first; difficult areas are handled according to the condition of the drive and your priorities. This is work on a particular damaged device, not a standard software download.
4. Environmental damage and encryption
Fire or flood damage may require a tailored contamination and electronics plan. Encrypted devices can involve preserving original components, checking unlock material and verifying the recovered result. Complexity comes from the actual combination of issues, which is why Level 5 is individually quoted.
Your approval comes first. We identify your priority files, define what success means and explain the work, upfront amount and conditional success fee. We customise each job to suit your needs. If the scope changes, further chargeable work needs a revised agreement.
The upfront fee is not a success guarantee. Once the approved work begins, that component is non-refundable under the recovery terms, even if no data is recovered. A success fee is charged only when the agreed success criteria are met. For Levels 1 and 2, there is no upfront recovery component.
Read the recovery fee conditions or call 1300 806 557 to discuss your priorities before approving work.
Inside the recovery process
Real drives. Different paths back to the data.
Six drives from our bench: what came in, what we did, what went back. Each one is a particular job; none of them predicts the result for another drive.
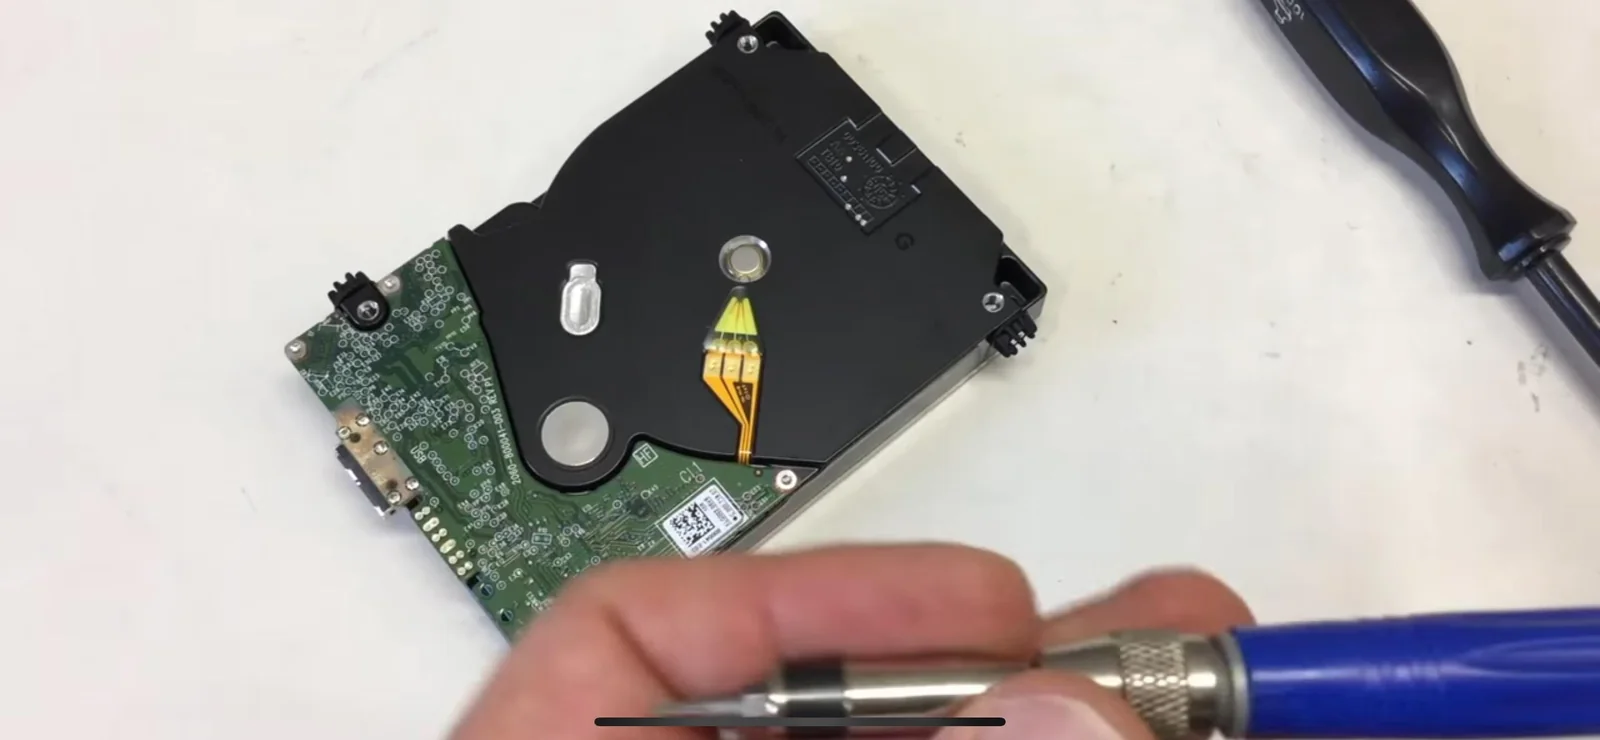
Featured case · Level 4 · Dropped drive
A dropped WD_BLACK. Three project folders recovered.
- THE PROBLEM
- It fell while it was running. By the time it reached us it clicked on power-up and Windows could not see it.
- THE RECOVERY WORK
- We fitted compatible donor heads, kept the original electronics, and imaged the healthy platter regions first, going back for the damaged area last.
- THE OUTCOME
- The three project folders the client nominated came back, opened, and were verified against their list.
A Seagate drive appeared RAW after a repair scan
Slow reads and I/O errors, then an overnight repair scan that left the volume showing as RAW. We imaged every readable sector on hardware first and rebuilt the file system on the copy, never on the drive.
Outcome
Read the complete case file →A decade of photographs and the small-business documents came back. Level 2, so no upfront recovery fee.
The 3TB desktop drive that died in a storm
A power surge took out the protection component and the motor controller, and the drive stopped responding. We moved the original ROM onto a donor board so the drive-specific data survived the swap, then imaged it.
Outcome
Read the complete case file →A complete image and a verified recovery.
The 8TB Western Digital from a bushfire
It came out of a bushfire with a melted enclosure and soot through the chassis, and nobody had powered it since. We cleaned the chassis, fitted a replacement board carrying the original ROM, kept the helium seal intact, and imaged it under control.
Outcome
Read the complete case file →The family’s photo and video library went home.
The iMac drive that would not finish copying
The 1TB Western Digital from an iMac crawled and threw read errors on every copy attempt. On the PC-3000 we imaged the easy regions first and came back for the weak ones in controlled passes.
Outcome
More than 99% of sectors read, and the photograph library was recovered. That 99% is sectors imaged, not files verified: file checks are a separate step, and the figure is specific to this drive.
The laptop drive that beeped
After a fall, the 2.5-inch drive beeped and would not spin: the heads were stuck to the platter and damaged. We fitted a compatible donor head stack at the clean-air bench and imaged the drive.
Outcome
The recovered data was checked file by file against the client’s nominated list.
Past outcomes do not set the price or guarantee the result of a new job. The assessment and your written quote govern your recovery.
Free tool · No report upload
Make sense of a SMART raw value.
Convert an existing hexadecimal or decimal reading without powering up the drive again. A large raw number is not, by itself, a count of failed sectors.
Interpret the format, then the value
Your conversion
Enter a raw value to see its decimal and hexadecimal forms.
Unknown layout? Use conversion only. This tool does not diagnose the drive or calculate a health score.
Supported formats, method and sources
Version 1.0 · 30 September 2026. Accepts unsigned values from 0 to 281,474,976,710,655 (48 bits). Hexadecimal input may have a 0x prefix. Spaces around the input are ignored; separators and mixed formats are rejected.
Conversion mode: shows the same integer in base 10 and base 16. It assigns no meaning to the bits. Values beyond 48 bits, complete SMART reports, SSD/NVMe health fields and unknown packed layouts are not decoded.
Optional Seagate ID 7 layout: for the documented six-byte format, the upper 16 bits contain seek errors and the lower 32 bits contain the seek count: errors = floor(raw ÷ 2³²); seeks = raw mod 2³². These are reported counters, not a recovery probability or necessarily lifetime totals. The historical specification describes counter resets. Zero errors in this field does not establish that a drive is healthy.
Why the layout is not selected automatically: model families and tools differ. For example, smartmontools defines raw24/raw32 formatting for some Seagate families. Do not force those values into this six-byte interpretation. Attribute 1 (Read Error Rate) and 195 (Hardware ECC Recovered) are not decoded here.
- Seagate: Drive Health and SMART — manufacturer explanation of vendor-specific fields.
- Seagate SMART Attribute Specification (2010; mirrored PDF) — historical ID 7 field layout.
- smartmontools drive database — model-dependent formatting. Check the entry for your exact model.
Link to this tool: Wildfire SMART raw value converter. When sharing a result, include the input base, selected layout and tool version.
First-error odds board
Your drive just logged its first error. What happens next?
Tap the event that has just appeared in your SMART report. The bars show what Google’s study of more than 100,000 drives found over the next 60 days; the dots show how often a failing drive gave no warning at all.
Which event just appeared for the first time?
Badges are the closest modern counters; Google used its own signal names. *Scan errors map nearest to ID 198.
1×Failure risk in the next 60 days39×
First scan errorUnder 2% of drives logged one in the study
1×
~70% still running after 8 months
First reallocated sectorAbout 9% of drives logged one
1×
~85% still running after 8 months
First offline reallocationNo 8-month survival share published
1×
—
First pending sectorAbout 2% of drives logged one
1×
—
SMART 187 above zeroBackblaze fleet, different measurement
Failed drives with any of 5/187/188/197/198 above zero76.7%
Working drives with the same4.2%
Backblaze’s own rule: once 187 goes above zero, the drive is scheduled for replacement. “Drives with zero uncorrectable errors hardly ever fail.”
Relative to drives in the same 2005–06 fleet with no such error; consumer drives of 80–400 GB. These are odds ratios, not a countdown.
Did the drives that failed give any warning?
Fewer than 44 of 100 failed drives showed at least one of the four signals aboveOver 56 of 100 showed none of the four
36% of failed drives had zero on every SMART variable Google tracked.
76.7% of failed drives had at least one of 5, 187, 188, 197 or 198 above zero23.3% had none of the five
Only 4.2% of working drives had any of the five above zero. Failed drives averaged 27.7 power cycles; working drives 10.2.
Can software predict it?
Failures caught55%
False alarms12%
30-day prediction on one Seagate model (ST12000NM0007), Q2 2019 – Q1 2020. AUC 0.724.
An error count above zero is the drive telling you it has started moving data around. If it still reads, image it now; that is Level 1–2 work. If it has started clicking or dropping out, stop powering it on.
Sources: Google, FAST ’07 · Backblaze 2016 · Backblaze 2014 · arXiv 2102.06509. Figures are published data, not a prediction for your drive.
Explore health readings, supported brands and recovery terminologyOptional technical detail, kept together so you can read what is relevant.
Is my hard drive failing?
How to check hard drive health before it fails
Use readings you already have and symptoms you have already noticed. SMART cannot certify a drive as healthy. If it has been dropped, makes abnormal sounds or is unstable, leave it off rather than running another test.
Tick everything that applies
SMART values are on the tool’s main screen; the attribute codes are in brackets.
Guidance
Select an observation to begin
No observations selected. This does not establish the health of the drive. Keep a verified backup even when a drive reports no errors.
Start a free diagnosticSMART is a self-report from the drive and a drive can fail with a clean report, especially after a drop or a surge. Do not keep running a suspect drive just to collect more readings. Attribute names follow the common SMART tables published by the drive makers.
Explore the hard drive brands we recover
Every make, every model
Hard drive brands we recover
Every brand fails in its own way, and our donor library and firmware tooling are organised around those families. The bench notes below are the things worth knowing before you send a drive in.

Seagate
Barracuda, IronWolf, Expansion, Backup Plus, One TouchThe F3 firmware families have well known failure modules. Expansion and Backup Plus externals often need the bridge board data to be read.
Seagate recovery guide
Western Digital
Blue, Black, Red, My Passport, My Book, ElementsSome My Passport and My Book families use hardware encryption even when no password is set. Keep the enclosure and board together; we need them.
All brands we recover
Toshiba
Canvio, P300, N300, laptop 2.5 inch drivesVery common in laptops. Head failures and stiction require model-specific assessment and compatible parts.
All brands we recover
HGST / Hitachi
Deskstar, Travelstar, UltrastarRobust drives with a firmware architecture of their own. Firmware and head work both well supported on the PC-3000.
All brands we recover
Samsung
Spinpoint, M3 and M2 portablesOlder Spinpoint drives and the Seagate-era Samsung portables. Donor parts are still in our library.
All brands we recover
LaCie
Rugged, d2, Porsche DesignSeagate drives inside premium enclosures. The Rugged range survives drops better than its drive does; the drive is what we recover.
All brands we recover
G-Technology
G-Drive, G-RAID, ArmorATDCreative professionals’ drives, often full of video projects. WD and HGST drives inside, handled the same way.
All brands we recover
Buffalo
DriveStation, MiniStation, LinkStationConsumer externals plus single-bay NAS units. LinkStation volumes use Linux file systems we reconstruct in the lab.
All brands we recover
Maxtor
OneTouch, DiamondMax, M3 portableLegacy desktop drives and the Seagate-made Maxtor externals. Older drives need older donor parts, which we keep.
All brands we recover
Fujitsu
MHV, MHW, MHZ laptop drivesCommon in laptops from the 2000s. Still recoverable, still in the donor library.
All brands we recover
Iomega
Prestige, eGo, Zip-era externalsOlder externals with drives from several makers inside. We identify the drive and treat it accordingly.
All brands we recover
Verbatim
Store ’n’ Go, Store ’n’ SaveBudget externals with Toshiba or Seagate drives inside. Enclosure and bridge boards are often the only fault.
All brands we recoverSpeak bench
Hard drive recovery, translated
The terms you will hear from us, and from anyone else you get a quote from, in plain English.
- Head crash
- Physical contact between a read/write head and the spinning platter. Scratches the magnetic coating and creates debris; one way that data can be permanently damaged.
- Stiction
- Heads stuck to the platter surface, usually after a drop or a long idle period. The motor cannot spin and the drive beeps. Fixed by lifting and replacing the heads.
- Firmware
- The drive’s own operating system, stored in reserved tracks called the service area and in a ROM chip on the board. Corrupt firmware makes a healthy drive undetectable.
- Service area
- The hidden inner tracks of the platter that hold firmware modules, defect lists and translator tables. Not accessible through ordinary file-recovery software; specialist tools may be needed.
- Donor drive
- An identical or closely matched drive sacrificed for its head stack, motor or circuit board. Matching model, firmware family and often manufacturing date matters.
- Imaging
- Copying every readable sector of a failing drive to healthy storage with a hardware imager, so file reconstruction can be performed on the copy.
- Bad sector
- A patch of platter surface the heads can no longer read reliably. The count, its trend and the drive’s behaviour need to be assessed together.
- PCB and ROM
- The printed circuit board on the underside of the drive, and the small chip on it holding calibration data unique to that drive. Board compatibility may depend on preserving or transferring drive-specific information.
- Clean-air bench
- A portable ISO Class 5 rated laminar-flow enclosure in which drives are opened. It keeps airborne particles away from the platters during head swaps.
Listen & compare · real recordings
What does a failing hard drive sound like?
Play the examples here. Leave your own drive switched off if it may be damaged.
Normal spin-up
Listen for the rising spindle sound, a brief loading tick and a steady hum. Normal sounds vary by drive model.
The recording’s waveform loads when this player is visible.
Tap play to listen
0:00 / 0:06
Repeated clicking
A repeated click over the motor sound. With failed reads or a recent impact, stop using the drive and seek assessment.
The recording’s waveform loads when this player is visible.
Tap play to listen
0:00 / 0:20
Beeping / strained startup
Beeping does not identify a single fault: power, connection or mechanical issues can be involved. Keep a damaged drive disconnected.
The recording’s waveform loads when this player is visible.
Tap play to listen
0:00 / 0:53
Grinding on startup
A short grinding startup recording. A new scraping or grinding sound is a reason to stop using the drive and seek an assessment.
The recording’s waveform loads when this player is visible.
Tap play to listen
0:00 / 0:04
These are representative source recordings, not recordings of a Wildfire client drive. Similar sounds can have different causes; sound alone cannot establish the fault or recovery level. Read the clicking-drive guide.
Inside your hard drive
Explore the drive. Understand the recovery.
Choose a named component below or a number on this real laboratory photograph. Each panel explains its role and why a fault can interrupt access to your files. The PCB is underneath; firmware is not a visible component. Their markers indicate approximate locations. Do not open your own drive.
Tap a numbered part, or arrow-key through them
Read/write headsPart 1, the fragile one
What it does
A stack of arms carries one tiny head per platter surface, flying on a cushion of air thinner than a fingerprint. They read the magnetic pattern and never touch the platter while the drive is healthy.
How it fails
Drops, wear and overheating damage the sliders. A damaged head cannot read, so the drive clicks as it searches, or scrapes the platter as it flies too low.
What it means for your data
Head failure is the most common physical fault we see and one of the most routine to fix: we source a matching donor head stack from our library, swap it on the clean-air bench and image the drive.
PlattersPart 2, your data
What it does
Rigid glass or aluminium discs coated in a magnetic layer only nanometres thick. Every file you own is a pattern of magnetic domains on these surfaces.
How it fails
A head crash scratches or strips the coating. A scratch through the coating is a form of permanent damage: the data in that ring is gone, and the debris damages any new heads that fly over it.
What it means for your data
Most platters we see are untouched. When they are scratched we map the damage, keep the heads away from it and image everything around it, which is usually the large majority of the drive.
Spindle motorPart 3, the engine
What it does
A fluid-bearing motor spins the platter stack at 5,400 or 7,200 rpm, sometimes 10,000 or 15,000 on enterprise drives, with almost no wobble.
How it fails
A hard knock or a fall seizes the bearing. Stiction, where heads stick to the platter, stalls the motor. Either way the drive buzzes or beeps and never reaches speed.
What it means for your data
Seized motors on modern drives mean a platter transplant into a donor chassis, one of the most delicate jobs in the lab. Stiction is simpler: lift the heads, replace them, image.
Actuator and voice coilPart 4, the muscle
What it does
A powerful magnet and a coil swing the whole head stack across the platter in milliseconds. The flexible ribbon beside it carries the head signals to the preamp chip.
How it fails
Impact can shift the magnet or crack the preamp. A failed preamp looks like a head failure from outside: the drive clicks, or spins and does nothing.
What it means for your data
Preamp and actuator faults are solved with the same donor head stack swap, because the preamp lives on the head assembly. Diagnosis tells us which it is before any parts are ordered.
Circuit board (PCB)Part 5, underneath
What it does
The board on the underside runs the motor, drives the heads and talks to your computer. A small ROM chip on it holds calibration data unique to this exact drive.
How it fails
Power surges, wrong adaptors and liquid short the board. The classic symptom is a drive that is completely dead: no spin, no sound.
What it means for your data
We repair the board or transfer the ROM chip to a matching donor board. Swapping a board without moving the ROM is the most common DIY mistake we undo.
Firmware and service areaPart 6, the hidden one
What it does
Reserved tracks near the centre of the platter hold the drive’s own operating system: defect lists, translator tables and adaptive settings the drive needs before it can find a single file.
How it fails
A corrupt module makes the drive report 0 bytes, the wrong model, or nothing. Seagate, Western Digital and Toshiba families each have well known firmware failure patterns.
What it means for your data
Firmware repair on the PC-3000 rebuilds or patches the broken modules so the drive can translate addresses again. It is invisible from outside and impossible with software.
Scale and consequence
Smaller than you can picture. Faster than you think.
Tap a size to see it against the head gap. Then draw a scratch and count the tracks under it, and how many times the heads fly through the debris while the drive keeps running.
Four sizes, one gap
Typical published figuresFly height over time1956 51,000 nm 1961 6,350 nm 2011 about 5 nm
Draw a scratch
Typical published figuresAbout 1.3 hairs wide
50–70 nm on most PMR drives, under 40 on dense enterprise; 50 is the worked-example figure
Spin speed
Platter
1 mm of platter surface, to scale| = one hair (0.075 mm)
2,000tracks under the scar
129 km/hplatter edge, 35.8 m/s
0head-surface passes through the debris
A crash strips the lubricant, overcoat and magnetic layer, and the debris rides the airflow onto every other surface. Each minute after that reduces recoverability.
We inspect the platters under magnification before quoting a Level; this is the physics, not your drive.
Sources: Rossmann: what happens during a head crash · Rossmann: how heads work · Wikipedia: flying height · datarecovery.com: hair vs gap. Figures are published data, not a prediction for your drive.
From first call to verified files
A clear plan at every stage.
Your drive. Your priorities.
Tell us what happened and which files matter most. The free standard assessment identifies the proposed work and recovery level.
A written scope and quote.
Agree the intended outcome, fees and next steps before recovery. Levels 1–2 have no upfront recovery fee; Levels 3–5 have an agreed upfront component.
Check the files that matter.
We work to the approved plan and verify the result against the agreed criteria. Any success fee depends on that outcome. Recovered files are returned on separate storage.
See the laboratory work behind those stagesDiagnosis, stabilisation, imaging, reconstruction and verification.
Inside the lab
Our six-stage hard drive data recovery process
The plan depends on the device and the damage. Wherever technically possible, we secure readable data in an image before reconstructing the files from that copy.
1
Intake and case notes
Enclosure, model, symptoms and everything already tried are documented before the drive is touched. Externals are checked for bridge-board encryption.
2
Diagnosis
Electronics, firmware and mechanics are tested in that order on the PC-3000. You get the fault, the recovery plan and a fixed quote. Free.
3
Repair to read
Board repair with ROM transfer, firmware module repair, or a donor head swap on the ISO Class 5 rated clean-air bench, whichever the fault needs.
4
Imaging
Sector-by-sector copy on hardware imagers with head-friendly timeouts, good areas first, difficult areas last. The original is never written to.
5
File-system rebuild
Partitions, NTFS, APFS, HFS+, exFAT and ext volumes are reconstructed from the image and your folder tree is restored with names and dates.
6
Verification and return
Files are opened and checked against your nominated list. You see the list, approve, pay, and the data ships on new media with tracking.


Board vs platters
Press power. Break a stage. See where your data is.
A hard drive starts in three steps. “Dead” often means one of them stopped, and your files can still be sitting on the platters behind it.
Around 10% of one US lab’s cases were firmware faults with healthy platters and intact data (Gillware).
Your computer sees
Press power.
The bench sees
Waiting for power.
Press power first.
Where your data isOn the platters.
Swap the boardThe DIY move that stops modern drives
Boards made after 2003 keep this drive’s own settings in an 8-pin ROM chip. Choose a donor board, or drag the chip across.
Your board
Donor boardROM
Waiting for a donor board
Choose a donor board, or drag the ROM chip across.
Symptoms overlap; only the bench can tell which stage failed. Tell us exactly what your computer shows: 0 GB, a wrong name, not detected. We will tell you which stage we think it is.
Sources: Gillware, Firmware Corruption and Data Recovery · Rossmann Group, firmware corruption symptoms · Rossmann Group, PCB components. Figures are published data, not a prediction for your drive.
Clean air, by the number
How clean is “clean”?
Every lab says cleanroom. The standard counts particles of 0.5 µm or larger in one cubic metre of air. Tap a rung and watch the cube.
Particles ≥0.5 µm per m³, ISO 14644-1.
One cubic metre. Dots are on a log scale: every 20 extra dots is ten times more particles.
Ordinary room air. The kitchen table, the office desk.
- Particles ≥0.5 µm / m³
- 35,200,000
- Against the bench
- 10,000× more
- Air changes / hour (class guidance)
- not specified
- Filter grade (class guidance)
- not specified
Air changes and filter grade are vendor design guidance for the class, not part of the standard and not a measurement of our equipment. The ISO 5 figures are class limits, not a reading taken on our bench.
What lands on the platter
Same log scale, nanometres. Tap a marker.
Tap a marker to compare.
The lid is off for the whole swap
Typical published open-drive window for a head swap: 15–45 minutes. The air over the platters has to stay clean for all of it.
0 min
This is where your drive is opened, and only after imaging is planned. If yours has been opened anywhere else, tell us in the enquiry; it changes how we approach it, not whether we will.
Sources: ISO 14644-1 class table · ISO 5 standards · laminar-flow bench · head swap. Figures are published data, not a prediction for your drive.
Donor matching
Read your label the way we read it.
A head swap needs a donor that matches far more than the model number. Pick your brand, tap the fields on the label, then test two date codes against the published 12-week window.
Illustrative label, serials masked. Tap a numbered field.
Tap a field on the label
Every highlighted field is something we compare before a donor goes near your drive.
Preamp: exact. A gain mismatch means uncorrectable reads.
ROM stays with your drive. It moves onto the donor board. A donor ROM gives LED 000000CC or Diag Err.
Helium and HAMR. Helium donors are matched in weeks. PMR heads never fit a HAMR (Mozaic) drive.
Date window ruler
Seagate prints YYWWD or YYWD: fiscal year, week, day. The fiscal year starts on the first Saturday of the previous July. Type two codes and see where they land.
Enter both codes to place them on the ruler.
Western Digital? Check the DCM anchor
The J or 2 near the end, and the character before it, must match.
Pick the donor
One patient, three donors. Two differ in a single field. Tap the one we would try first. The patient is an air-filled Barracuda 7200.12, so the 12-week window applies.
Tap a donor card.
Send us a clear photo of the label with your enquiry and we can check donor availability before the drive leaves your desk. We check our library and the donor market. A matched label is necessary, not sufficient: platter condition decides the rest.
Sources: Rossmann Group, how donor drives are matched · DQ, helium drive recovery · HDDSurgery head tools · Cheadle, ST31000528AS head swap. Figures are published data, not a prediction for your drive.
Australia-wide mail-in
How to pack your device for recovery
For dry internal drives, external drives, SSDs and NAS systems. Confirm your case and required components with the laboratory before sending anything.
Beware of ESD
Protect against static and impact.
Electrostatic discharge is a sudden transfer of static charge. A discharge too small to notice can damage electronics immediately or weaken them over time.
Before handling a bare drive, discharge static by touching a safely grounded metal object. Handle the drive by its edges and avoid connector pins and exposed circuit boards. Use an ESD shielding bag; ordinary plastic and bubble wrap are not a substitute.
The bag protects against static. Cushioning and a rigid box provide the separate protection needed for transport.
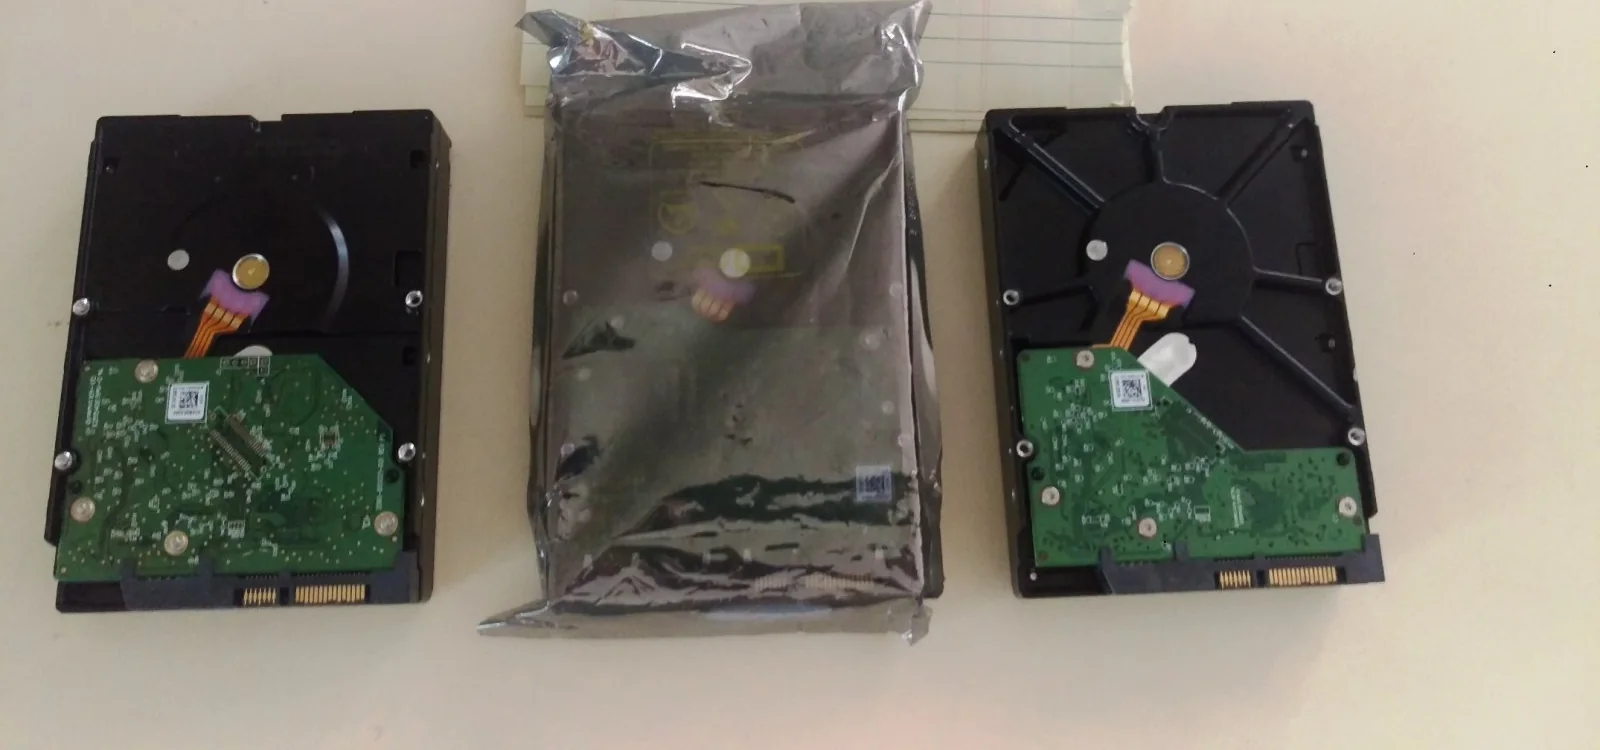
Single internal drive, external drive or SSD
- Protect against static. Put the device in an ESD shielding bag. Keep an external drive in its original enclosure unless the lab advises otherwise. Do not open a sealed hard drive.
- Cushion the bagged device. Use bubble wrap or a bubble-wrap sleeve, then a rigid box with at least 5 cm of cushioning on every side. Fill gaps so the device cannot move. A padded envelope alone is not sufficient.
- Add your case slip. Include your name, contact details, case reference, what happened and the files you need most. Keep passwords and recovery keys off the parcel; arrange secure transfer with the lab.
- Seal every opening. Use strong nylon or vinyl packing tape along the seams and openings.
- Label and track. Attach the supplied shipping label outside the box. Keep the tracking number and lodgement receipt.
Multiple drives
- Identify each drive. Label its position or role without covering connector pins or breather holes. For RAID or NAS members, record and photograph the original bay order.
- Bag and wrap individually. Use a separate ESD shielding bag and bubble wrap for each drive. They must not touch each other or the box walls.
- Use a rigid box. Provide at least 5 cm of cushioning around the protected drives and enough separation to prevent movement or collisions.
- Include the case slip and drive list. Note missing members, original bay numbers and any drives replaced during troubleshooting.
- Seal and label. Tape every seam and opening with nylon or vinyl packing tape. Put the shipping label outside and retain tracking details.
NAS storage systems
- Confirm what the lab needs. Ask whether to send the complete NAS, the drives, the power supply or other original parts. Recovery requirements differ from manufacturer warranty returns.
- Preserve the drive order. Photograph the bays and label each drive with its original bay number before any instructed removal. Include all available members, including failed or previously replaced drives if requested. Do not rebuild or initialise the array.
- Protect the requested components. Use suitable ESD protection and bubble wrap. Pack separately shipped drives as described under Multiple drives. Protect and secure the NAS chassis in a rigid box with adequate cushioning for its weight.
- Include the system notes. Add your case slip, NAS model, bay map, what changed before failure and which parts are included.
- Seal, label and track. Tape every seam and opening with nylon or vinyl packing tape. Place the shipping label outside and keep your receipt.
Do not use loose packing pellets, peanuts, inflatable air pillows or newspaper. They do not provide the stable protection required for these devices.
Wet, fire-damaged or contaminated?
Call 1300 806 557 before packing. Leave the device off and do not heat, clean or dismantle it. Special handling may be needed; the dry-device instructions above may not apply.
Tick the checks as you prepare the parcel.
Adapted for recovery intake from Seagate's packing and ESD guidance and Wildfire's shipping instructions. Follow the laboratory's device-specific advice.
Deleted, emptied or formatted
Is it actually gone?
Tap what happened and where the file lived. Whether the bytes are still there depends on the media, the cable and the file system, not on how bad it feels.
What happened
Where it lived
How it is connected
File system
How long ago
Likely still there
Stop writing to it.
now
Erase stopped
Every write since the delete is a risk to the space you need back. Tap to see one land.
Is it still powered on right now?
Nothing here to press. Switch it off and leave it off; the bench can look at what the phone holds without running anything on it.
A drive that will not start is a hardware job, not a deletion. Use the symptom picker to see which bench it goes to.
Sources: Rossmann Group on TRIM and SSD recovery, DiskTuna r/datarecovery FAQ, Rossmann Group on what PC-3000 does. Figures are published data, not a prediction for your drive.
Let’s discuss your drive.
Tell us what happened and which files matter. We will discuss the assessment and build the recovery plan around your priorities. You approve the written scope and fees before chargeable recovery work begins.
Clear answers before you decide
Hard drive recovery questions
No matching question. Try another word or call the laboratory.
Can data be recovered from a failed hard drive?
Sometimes. Recovery depends on the fault, the condition of the recording surfaces, any overwritten data and access to required encryption keys. An assessment can establish the likely approach and limitations; no symptom checker can guarantee a result.
Is the assessment free, and when would I pay?
The standard diagnostic is free. Levels 1 and 2 carry no upfront recovery fees: $0 is payable upfront for the recovery work. Level 3 is $350 + GST upfront and $350 + GST only upon success. Level 4 is $725 + GST upfront and $700 + GST only upon success. Level 5 is individually quoted and carries an agreed upfront fee. Upfront recovery components are non-refundable once approved work begins. Any optional priority charges are separately quoted.
How much does hard drive recovery cost?
Level 1 starts at $170 + GST ($187 including GST). Level 2 is $320 + GST ($352 including GST). Neither carries an upfront recovery fee. Level 3 totals $700 + GST ($770 including GST) if successful, split into $350 upfront and $350 upon success, plus GST on each. Level 4 totals $1,425 + GST ($1,567.50 including GST) if successful, split into $725 upfront and $700 upon success, plus GST on each. Level 5 fire, flood and BitLocker cases are custom quoted: call 1300 806 557. The assessed scope and written quote govern your job.
What if I only need a few important files?
Tell us before recovery starts. A critical file register identifies the folders or files that matter most and defines the agreed outcome around those items. Include filenames, folder paths, approximate dates and the application needed to open them. A file listing alone does not prove that the contents are usable.
How long does hard drive data recovery take?
Timing is quoted for the individual job. It depends on the fault, parts, controlled imaging progress and workload. Tell us about your deadline before approving work. Ask about priority options and any separately quoted charges; faster handling cannot guarantee a recovery outcome.
Should I try recovery software first?
Software cannot repair physical damage. If a drive is grinding, repeatedly clicking with read failures, was dropped or is unstable, stop and seek advice. For accidental deletion on a stable drive, avoid writing to the source and seek guidance on preserving a separate image before recovery. Never install recovery software or save results on the affected drive.
Do you recover external and encrypted hard drives?
We assess external and internal hard drives, including encrypted storage. Keep the original external enclosure, cable and power supply: bridge electronics can be important to accessing the data. Recovery of readable encrypted sectors does not remove encryption; passwords or recovery keys may still be required. Do not put passwords or recovery keys in the enquiry form.
Can I post a drive from outside Brisbane?
Yes. Australia-wide mail-in is available with a free Express post-in label for the standard assessment. An engineer can collect your device within central Brisbane. Follow the packing instructions and contact us before sending a wet or contaminated device. We have no public drop-off.
How do I check the recovered files?
Review the file listing against your agreed outcome or critical file register. The policy provides a seven-day listing review and a fourteen-day verification period after delivery. Open important files in their usual applications, check that their contents are intact and report concerns promptly.
Will my original drive be returned?
The original device is returned under the terms of service. A failed drive should not be treated as reliable storage after recovery. Ask about suitable return media and keep another backup of the recovered data. Data handling and retention are explained in the privacy policy.
Why is my hard drive not showing up?
An undetected drive can have a connection, power, enclosure, firmware or internal hardware problem. Seeing the correct capacity in a disk utility is useful information, but is not proof the drive is healthy. Do not initialise, format or erase a drive when its existing files are needed. If it is noisy, was dropped or repeatedly disconnects, stop using it and arrange an assessment.
Is hard drive repair the same as data recovery?
The aims are different. Repair seeks to make a device usable; recovery seeks to retrieve the files. A recovery may require temporary electronics or mechanical work so the data can be imaged. That does not make the failed drive dependable storage again. Recovered files should be placed on separate storage and backed up.
Can a fire-damaged hard drive be recovered?
An assessment is needed. External charring does not reveal the condition of the recording surfaces, and heat, contamination and water from firefighting can affect different components. Leave the drive unpowered, keep all of its parts and contact the laboratory for handling instructions. Severe recording-surface damage can prevent recovery.
Can you recover data after a hard drive PCB failure?
A board fault may be recoverable when the required drive-specific data and recording surfaces remain usable. A matching-looking replacement board is not necessarily interchangeable: calibration information, firmware and sometimes encryption depend on the original electronics. Keep the original PCB and ROM components and avoid further board swaps.
How should I protect the data after it is recovered?
Verify important files on the return media, then keep another independent backup. A practical approach is three copies, on two types of storage, with one copy off-site. Keep at least one backup disconnected or protected against accidental changes, and test restoring a small selection of files. A synchronised folder alone may also synchronise a deletion.
Why do Levels 3, 4 and 5 have upfront fees?
Complex recovery commits specialist labour, preparation, any required donor parts and controlled imaging before the outcome is known. The upfront fee covers the specific work agreed in your quote and is non-refundable once that work begins. It is not a guarantee of recovery. Any conditional success fee is charged only when the agreed recovery criteria are met. We customise the scope to your files, priorities and needs. Levels 1 and 2 have no upfront recovery fee.